Exercises for extra credit.
Once you think you've mastered the art of Adobe Edge Animate symbols, transitions and all the skills covered in this tutorial, it's time to put your new skills to the test.
Try out these exercises in the order they appear here to make sure you really have got the hang of it. If you need more help, refer to the Tutorial section of this site.
Try out these exercises in the order they appear here to make sure you really have got the hang of it. If you need more help, refer to the Tutorial section of this site.
Exercise 1: finish the landmarks.
Easy.
In the tutorials you've (hopefully) already completed, you learnt how to make a marker on a map and use mouse events with it. This resulted in a dot which sprung up a picture when the mouse hovered over it, and took you to a website when you clicked it.
In the tutorial, you had one landmark already made for you and you made a second one. This exercise is to complete the map by making the other three dots into fun landmarks just like the others.
Here are some quick steps to remind you:
1. Put a dot symbol on the map and name it for your landmark.
2. Drag on a picture of that landmark and resize it before making it a symbol too.
3. Add a pop-up animation on the timeline of your picture symbol.
4. Put code into the click, mouseover and mouseout events on your dot symbol.
Once you've mastered these steps your map should look and behave just like the Finished Product. But you can make it even better in the next exercise!
Exercise 2: add place labels.
Harder.
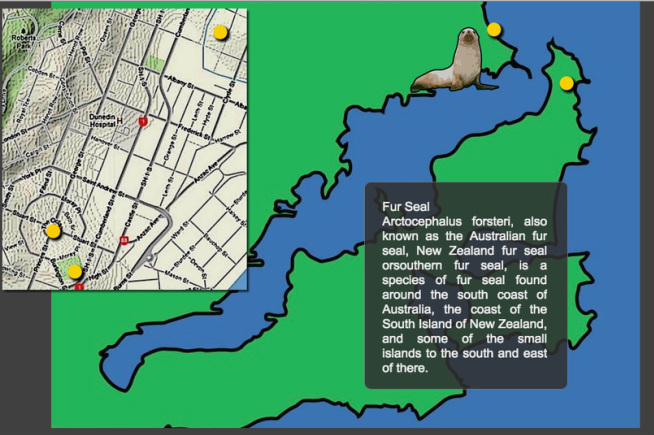
Your basic map has fun pictures which pop up to tell you what a tourist might see at the locations you've picked out, but it doesn't yet tell them the name of the place or have any information. Using the below picture for some inspiration, see if you can use the skills you've already gained to add these features to your own map. (You'll find a couple of hints below the picture too, just in case.)
Your basic map has fun pictures which pop up to tell you what a tourist might see at the locations you've picked out, but it doesn't yet tell them the name of the place or have any information. Using the below picture for some inspiration, see if you can use the skills you've already gained to add these features to your own map. (You'll find a couple of hints below the picture too, just in case.)
Hints:
Use the text tool and the rectangle tool to create the information panels (challenging), or make them in another programme and import them as images just like your pictures (easier).
Use the same method as you did for the pictures to get the information to pop up on mouseover. That is, make the info into a symbol, animate it, and use code in the mouse events to get it to appear.
You might like to experiment with the kinds of transitions you could use. Maybe a fade in (using the opacity settings) would look good for an information panel.
Exercise 3: do it yourself.
Hardest.
It's now time to get a bit more practice. Then you'll be perfect!
Using the same method as you've learnt to make this map, choose another place which is familiar to you and make a whole new map of that place. Here are some guidelines:
1. Choose somewhere you know well - maybe the suburb where you live or the favourite family holiday spot - and take a screenshot of the Google Map of that area to be your background map.
2. Take your own pictures or find them online and then cut around them to make them more interesting. If you want the square edges not to show, save your images as PNG files before you import them to Animate.
3. Try out transitions till you find one that suits the style of your map. You've done a fun style one, how about trying to make a classy one? This might mean you want your pictures to be more formal, and to fade in instead of bouncing.
Have fun with it!
